If the audio connections are not done correctly, even the greatest audio equipment will not perform to expectations. If your headphones or aux jack are unclean, you may hear popping and crackling, have a disruption in the signal, or even lose connection entirely. Therefore, it is crucial for optimal functioning to keep these jacks clean at all times.
How to clean the headphone jack safely and effectively. You can safely clean a headphone or auxiliary jack by wiping the inside with an alcohol-soaked swab, spraying the interior with compressed air, or (if you don’t have either of those things) gently brushing the inside with a very tiny brush.
This post will cover the three main approaches to cleaning headphone/auxiliary jacks, as well as troubleshooting and what not to do in such a situation. Do you want specific instructions on how to clean your headphone jack? We have gathered the data, so please refer to this guide.
Why Maintain Your Equipment
Maintenance is key to extending the life of your electronic devices. For the headphone jack, prevent dust, dirt, and other debris from entering it. Always cover the jack when not in use, and avoid storing your device in places with high dust levels.
Audio equipment, like all electronics, needs maintenance. Dust and dirt will accumulate if your audio device’s headphones and auxiliary connectors aren’t plugged in or stored properly.
Unlike classic Nintendo cartridges, blowing into the audio port to remove dirt isn’t recommended. Audio equipment is pricey and has delicate connections. Blowing into headphones or auxiliary jacks won’t damage them, but it’s not the best way to clean them.
Instead, we’ll explain three simple, foolproof techniques to clean your headphone port at home. We’ll also explore other inappropriate ways, sadly frequent. Debris in the jack may be causing audio connection issues. It’s simple to remove without harming the connection.
When my Aux is broken, how do I know?
There are a number of potential causes and remedies for a non-functioning auxiliary input (AUX). Here’s how to diagnose and fix the problem:
1. Check If There’s No Sound
It’s a rudimentary test. Try playing a sound via the AUX port to see if it works. If not, the AUX may be malfunctioning.
2. Check the Volume
Turn up the volume on both your source device (the phone or computer) and the destination device (the vehicle radio or speaker) before connecting the AUX connection.
3. Check Using a Variety of Tools
Test out the AUX port by plugging in many different devices. If none of these do the trick, the issue is probably the AUX port and not the gadgets you’re using to connect to it.
4. Check the AUX Cable
Wear and tear may cause AUX cables to break, so inspect the cable for any obvious damage. You might also try connecting the cord to a different gadget. If it doesn’t work there, the problem may lie with the cable.
5. Check the AUX Port Input.
Check the AUX port for obvious damage or debris. Avoid putting anything in there that might make things worse.
6. Test the Output Device With a Different Input
Check to see if you can hear anything by utilizing Bluetooth or another input option on your sound output device. If the output device is malfunctioning, you may use this to narrow down the source of the issue.
7. Verify the Compatibility of Your Device
Some AUX inputs may not work with some devices. See whether compatibility details can be found in the user manual or on the manufacturer’s website.
8. Check Device Settings
It may be necessary to manually select the AUX input on certain devices before they can accept external audio. Make sure everything is set up properly by checking your device’s settings.
If you’ve already tried that and it didn’t work, the AUX port could be damaged. In such a situation, you may want to think about getting in touch with an expert for repairs or maybe replacing the gadget altogether.
How to diagnose a faulty audio jack
Before you start cleaning your gear, you need to do a brief troubleshooting. Reboot the device, double-check the cords, and ensure that the USB connections are secure.
Before you try cleaning the jack, be sure the problem is with the jack and not the headphones or the source of the sound. If your headphones aren’t playing well with your gadget, try a different pair.
If plugging in your headphones doesn’t result in any noise, check their wiring. If that’s the case, you’ll need to reconnect any loose wires and maybe even solder them.
Without removing the insulation, it is impossible to tell whether the wires in your headphones have been damaged, although frequent usage may have already caused them to break. You may continue with jack maintenance if you find that these parameters are within reasonable limits.
Do I Have To Clean The Aux?
If you clean the jack on your headphones on a regular basis, you can maintain them in excellent condition and avoid debris such as dust and lint from limiting their lifetime or affecting their performance. If your jack is already working well without any adjustments, there is no need to change it.
Using a flashlight, do routine checks on the jacks to ensure that they have not been clogged with dust on the inside. If you often use audio equipment or other types of technological devices, you should always have a magnifier on hand. You may also try to search for problems by capturing a Flash video on your mobile device, then zooming in on it to examine it more closely. If you can see dirt accumulating within the jack, it is high time that you clean it.
Cleaning Your Headphone or Auxiliary Jack Cleaning Methods: Three Options
wikiHow Sources
You should prepare a clean, flat surface to set the audio device on while you clean the headphone or auxiliary connection. Usually, the plug (male connection) is the one that has to be cleaned, but the jack (female connector) should be cleaned just in case.
So, without further ado, here are three ways to clean your auxiliary/headphone jack:
1. Use Rubbing Alcohol to Clean Audio Jacks
Rubbing alcohol of at least 91% strength is required for this procedure. Keep in mind that it is rubbing alcohol. Whiskey with a higher proof won’t help (and may even be harmful if it includes sweeteners) in this situation.
- Since it evaporates rapidly and is harmless to electronics, you’ll need a concentration of 91% or higher. The strongest concentration available is 99%, and you can get it at any drugstore.
- To use, fill a ramekin or other small dish with alcohol and soak a Q-tip in it. Never insert a dry Q-tip into your jack; instead, soak it well.
- Gently rub the Q-tip in different directions and then remove it. The swab should be clean even if there is no visible residue.
- Don’t rush into testing the connections after cleaning them with alcohol; let it a few minutes to evaporate.
2. The audio jacks may be cleaned with a little brush.
If you don’t have the means for the preceding two methods, you might use a fine-tipped brush to dust the inside of the jack.
- This might be a paintbrush or a toothbrush with unusually long bristles.
- The latter, which is commonly available at any pharmacy, has helped several individuals. These tiny brushes have bristles similar to a toothbrush and are designed to pick up dust and other particles in the earphone jack.
- The key to this process is to rapidly move the bristle to loosen any debris in the jack without being too forceful and breaking the jack’s internals.
3. Clean Headphone/Auxiliary Jacks With Compressed Air
- The use of compressed air might be the most secure method. The internal connections are protected from the elements and wear and tear.
- Compressed air should be sprayed directly onto the jack. You may also utilize gravity if you turn your device upside down.
- The force of the wind should carry away everything that isn’t wanted. If you spray compressed air into the jack instead of blowing into it, no further moisture or saliva will enter the jack.
- Be careful not to spray WD-40 into the jack by mistake, and be sure you check the container often.
Things To Avoid
There are a few things you shouldn’t do while cleaning your headphones or auxiliary ports:
1. Don’t Clean Headphones/Auxiliary Jacks By Blowing Into Them
This could introduce moisture into the jack, potentially causing damage.
2. Don’t Clean Headphone/Auxiliary Jacks Using Water
Water can damage the electronics within your device. Always use isopropyl alcohol as it evaporates quickly and leaves no residue.
3. Don’t Clean Headphone/Auxiliary Jacks Using A Dry Q-Tip
This could push debris further into the jack or leave behind lint. If you’re using a Q-tip, it should be dampened with isopropyl alcohol.
4. Don’t Clean Headphone/Auxiliary Jacks Using Tape
Tape could leave adhesive residue behind, which can attract more dirt and dust. Also, it might get stuck within the jack.
Check your device before the end
Verify the proper operation of your headphones after cleaning the jack. If the problem still occurs after replacing the headphone jack, it is possible that the fault is not with the connector but with the headphones or the device. In any case, in addition to the female jack, the male jack should also be cleaned. If the plug seems clean on the outside, the issue may lie with one of the connections or both.
After you’ve done all that, you should use a flashlight to inspect the jacks for damage or debris before cleaning them. A grain of rice or a loose screw might be in your food. Holding the device upside down and cleaning it with a toothbrush may be necessary if there is a lot of dirt to remove. Alcohol might be used to dissolve the thing if that fails. The jack for your headphones ought to be operating like new. Maintaining the audio quality and longevity of your smartphone by regularly cleaning the headphone jack.
How to clean the headphone jack: FAQs
Should I clean my headphone jack?
Without proper cleaning, you eventually may not be able to plug in your headphones. Headphone jacks and aux ports on stereos can be cleaned quickly and safely. Compressed air blows out debris, but you can also use a cotton swab for tough debris or a taped paperclip to remove lint.
How do you clean headphones’ audio?
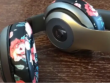
How to Clean Headphones. Wipe dry with some paper towels and leave to air dry completely. Dampen a small cloth with rubbing alcohol or hand sanitizer and gently wipe down the exterior of the ear pads. Then soak a Q-tip/cotton bud in alcohol/ hand sanitizer and use it to clean the nooks and crevices of the ear pads
How do you clean headphone wires?
Using paperclip and tape. After putting your phone in your pocket, lint may be stuck on your Android/iPhone headphone jack. The paperclip and tape method is best for tactfully removing these textile fibers without any damage caused.
Related category